
A rental property annual inspection checklist is a structured, system-by-system review landlords use once every 12 months to verify safety, maintenance, and habitability. Completing it in Suite 2000 and across the GTA helps you catch small moisture, electrical, HVAC, and structural issues early, reduce tenant disruptions, and document the unit’s true condition for confident decisions.
By Asmhomeinspection • Last updated: 2026-06-13
Overview and Table of Contents
Use this guide to run a thorough annual inspection for rentals: what it is, why it matters, the exact steps, room-by-room checklists, tools, and when to bring in a certified inspector. It includes a comparison table, a buying guide, local GTA considerations, and a printable-style checklist you can adapt to any unit.
Here’s how this complete guide is organized for quick scanning and action:
- What is a rental property annual inspection checklist?
- Why annual inspections matter for rentals
- How to run an annual rental inspection (step-by-step)
- Room-by-room and system checklist
- DIY vs. professional inspections (comparison)
- Buying guide: choosing the right inspection support
- Tools and resources
- Case studies and examples
- FAQ
- Key takeaways
- Conclusion
What Is a Rental Property Annual Inspection Checklist?
A rental property annual inspection checklist is a standardized list landlords use each year to verify safety, building systems, and habitability. It covers exteriors, roof/attic, structure, plumbing, electrical, HVAC, interiors, and safety items. A consistent, 12-month cadence prevents small defects from escalating into expensive repairs or tenant safety risks.
The checklist serves three purposes: risk prevention, documentation, and planning. Risk prevention means you find leaks, loose handrails, or GFCI problems before someone gets hurt. Documentation creates a reliable record for tenancy disputes or insurance claims. Planning means you prioritize fixes and schedule maintenance, instead of reacting when something fails.
- Scope you can trust: Exteriors, roof/attic, foundation, basement, plumbing, electrical, HVAC, doors/windows, walls/ceilings/floors, kitchens/baths, life-safety (smoke/CO), and moisture intrusion.
- Time-efficient: Most 1–3 bedroom units can be documented in 60–120 minutes if you arrive prepared with forms and tools.
- Repeatable: Use the same order each year so you can compare photos and notes side-by-side.
In our experience inspecting homes and apartments across the GTA, the best checklists are simple enough to finish in one visit yet thorough enough to catch early water intrusion, aging supply lines, or overheated breakers. That balance protects tenants and preserves asset value.
Why Annual Inspections Matter for Rentals
Annual inspections reduce risk, control maintenance, and protect asset value. By documenting safety devices, utilities, and building systems on a 12‑month cycle, you prevent small moisture or electrical issues from becoming major repairs, maintain compliance, and improve tenant satisfaction with fewer surprise outages.
Why does this matter to a landlord or property manager?
- Early moisture detection: Water is relentless. Even a slow drip can weaken framing within months. Catching it early avoids mold and structural damage.
- Life-safety confidence: Test smoke and carbon monoxide alarms annually; press-and-hold tests take seconds and can save lives.
- Electrical peace of mind: Warm breakers, scorched receptacles, or frequent trips signal load or wiring issues that deserve attention.
- HVAC reliability: Clean filters every 90 days, service equipment annually, and verify condensate drains. Comfort and air quality improve with consistent care.
- Tenant experience: Well-maintained homes get renewed leases more often, with fewer emergency calls and less turnover-related downtime.
For owners juggling multiple properties, a rental property annual inspection checklist standardizes your process across units. That consistency makes decisions faster and documentation airtight—especially helpful when you compare findings across buildings or over several years.
How to Run an Annual Rental Inspection (Step-by-Step)
Plan the visit, notify tenants, assemble tools, and inspect outside-in, top-to-bottom. Document every room with photos, test safety devices, and note maintenance priorities. Close with a brief tenant conversation, then finalize a same-day PDF summary so work orders can start immediately.
Follow this proven flow to complete your inspection efficiently and thoroughly:
- Schedule and notify at least 24–48 hours in advance. Offer two time windows to reduce rescheduling.
- Prepare your kit: flashlight, outlet tester with GFCI button, infrared thermometer, moisture meter, ladder (if appropriate), PPE, camera/phone, and printed or digital checklist.
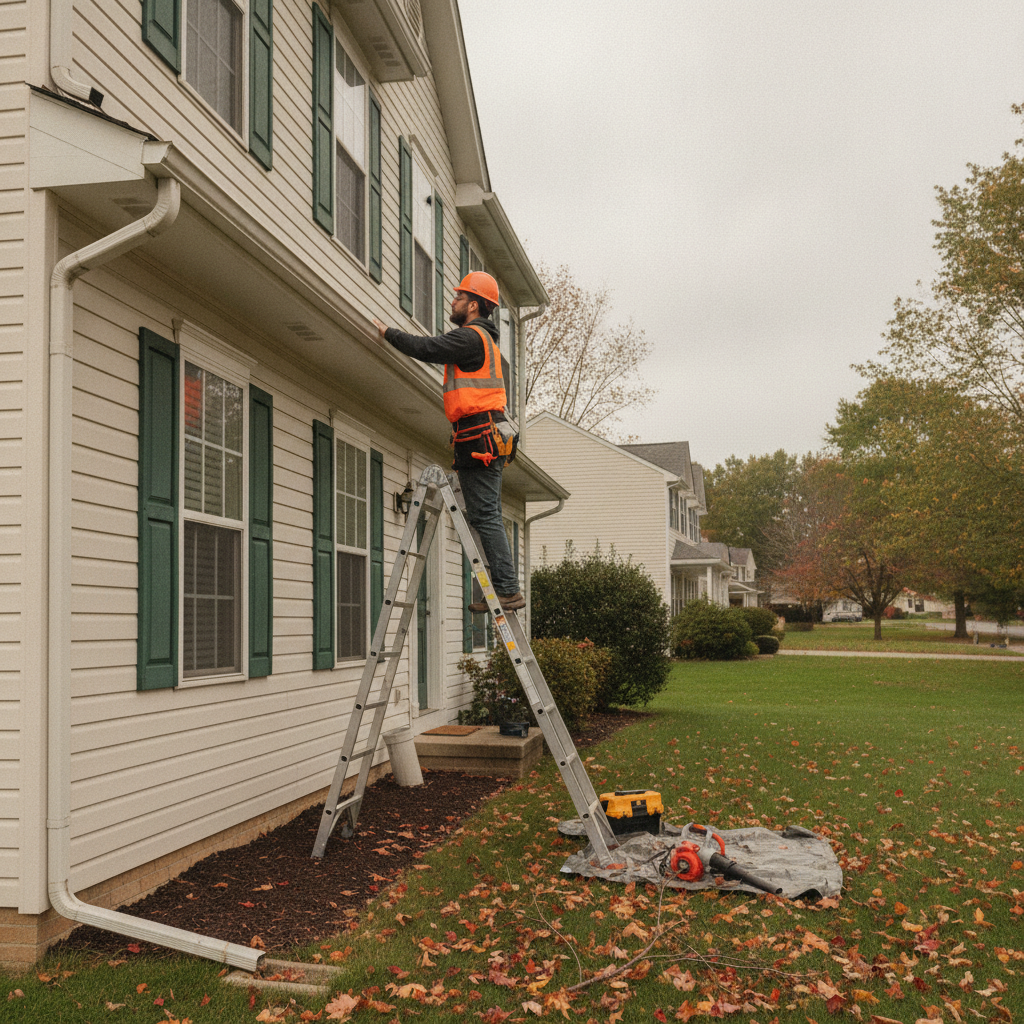
- Start outdoors: photograph exterior elevations, grade, walkways, steps/railings, siding, windows, foundation, and drainage points.
- Move to roof/attic (when safely accessible): look for missing shingles, soft sheathing, insulation gaps, and water staining.
- Check mechanicals: HVAC, water heater, shutoff valves, drain pans, and visible ductwork. Verify clearances and combustion air (where applicable).
- Room-by-room: kitchens, baths, bedrooms, living areas, hallways. Test outlets, lights, windows, doors, and plumbing fixtures. Note cracked tiles, worn caulk, and loose hardware.
- Life-safety test: smoke/CO alarms, GFCI/AFCI test buttons, handrails, and fire separations (e.g., garage-to-house door self-closing).
- Tenant chat: ask about leaks, condensation, tripping breakers, or appliance quirks. Tenants often notice patterns you won’t see in 30 minutes.
- Prioritize fixes: categorize as safety, urgent maintenance, preventive maintenance, and cosmetic. Assign target dates.
- Finalize a same-day PDF summary with photos and recommendations so work orders can proceed. If you want third-party validation, book a certified inspection for added assurance.
As a certified partner serving the GTA, we deliver same-day PDF inspection reports that property owners and managers can share with vendors or attach to maintenance tickets. That speed keeps projects moving.
Room-by-Room and System Checklist
Inspect exterior drainage, roofing, structure, plumbing, electrical, HVAC, interiors, and life-safety in the same order every year. Use photos, meter readings, and pass/fail notes, then prioritize repairs by safety first, function second, and appearance last to protect tenants and long‑term asset value.
Use the following framework as your standardized rental property annual inspection checklist. Tailor details to your building type and age:
Exterior and Site
- Grading slopes away from the foundation; no standing water 24 hours after rain.
- Gutters/downspouts intact; downspouts discharge 4–6 feet from foundation.
- Walkways, steps, handrails secure; trip hazards corrected.
- Siding, brick, or stucco sound; sealant intact at penetrations.
- Windows and exterior doors close/lock; weatherstripping in place.
Roof and Attic
- Shingles present, flat, sealed; flashing tight at chimneys/vents.
- Attic ventilation unobstructed; insulation consistent with no dark moisture stains.
- No active leaks; sheathing firm underfoot where accessible.
Structure, Foundation, Basement
- Foundation walls without active leaks; hairline settlement cracks monitored with dated photos.
- Basement or crawl space dry; sump and discharge functional where present.
- Beams, posts, joists sound; no sagging, rot, or boreholes.
Plumbing
- Main shutoff located and tagged; supply lines free of corrosion or bulging.
- Fixtures run without hammering; drains clear; traps intact; no active drips.
- Water heater venting/clearances correct; TPR discharge pipe full-length to safe termination.
- Caulking and grout watertight at tubs, showers, and backsplashes.
Electrical
- Service panel cover secure; labeling legible; no scorch or burned odor.
- Random-sample outlets with a tester; verify GFCI protection in kitchens, baths, and exterior locations.
- Fixtures operate; no flicker; switches firm; cover plates intact.
HVAC
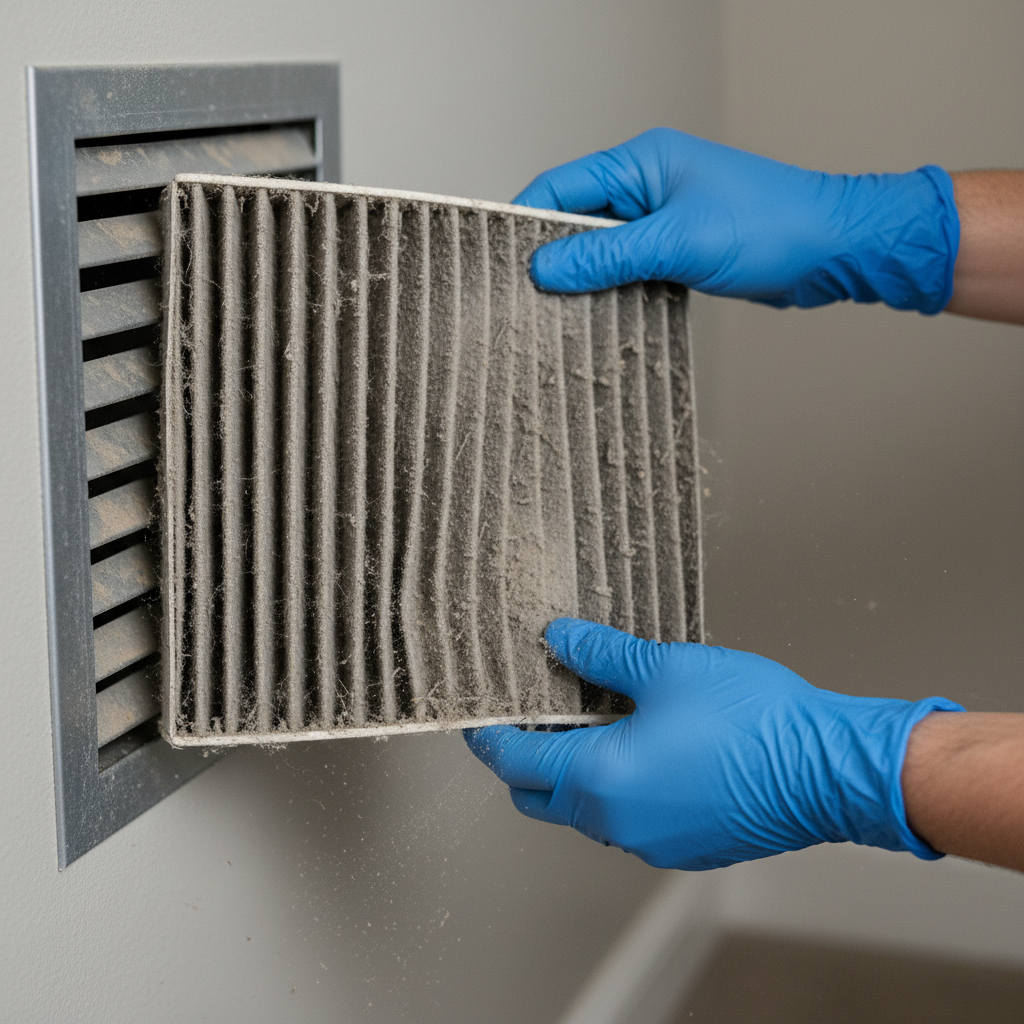
- Filters replaced on a 90-day schedule; size noted on the checklist.
- Thermostat responds; heat and cool modes verified seasonally.
- Condensate drain lines clear; pans clean; no rust streaks.
- Combustion appliances have required clearances and fresh air.
Interior: Kitchens, Baths, Living Areas
- Cabinets secure; doors/drawers align; anti-tip brackets on ranges where applicable.
- Exhaust fans vent to exterior; flows felt at hand; clean grease/dust.
- Flooring flat and secure; transitions smooth; no lifted edges.
- Windows open/close; locks latch; no broken seals or condensation streaking.
Safety and Habitability
- Smoke and CO alarms present where required; test buttons respond; replace units at the end of their rated life.
- Handrails and guardrails firm; spacing safe; no loose balusters.
- Garage-to-interior door is solid-core or rated and self-closing (where applicable).
Documentation
- Photograph every noted defect and its context; include serial labels for major appliances.
- List items by priority: safety, function, preventive, cosmetic.
- Summarize recommendations in a same-day PDF for fast vendor dispatch.
If you want an expert second set of eyes on high-stakes properties, schedule a certified residential or commercial inspection. Our InterNACHI and CCPIA credentials span houses, condos, retail, restaurants, offices, warehouses, and more across the GTA.
DIY vs. Professional Inspections (Comparison)
DIY inspections are useful for routine upkeep and obvious issues. Professional inspections uncover hidden defects with specialized tools, deep system knowledge, and formal reporting. For multi-unit portfolios or aging buildings, combining DIY walkthroughs with certified inspections delivers the best risk control.
Use this side-by-side comparison to choose the right level for each property and season:
| Factor | DIY Annual Walkthrough | Certified Professional Inspection |
|---|---|---|
| Primary goal | Routine upkeep, tenant feedback, quick fixes | Comprehensive risk assessment and documentation |
| Tools | Flashlight, outlet/GFCI tester, basic hand tools | Moisture meter, IR thermometer, ladders, electrical testers, scope |
| Depth | Visual, limited testing | System-by-system evaluation with photos and measurements |
| Deliverable | Notes or a simple checklist | Formal same-day PDF report with prioritized findings |
| Best for | Newer units or between pro visits | Older stock, turnover, insurance, or large portfolios |
| When to choose | Low risk, limited issues | Recurring leaks, electrical trips, structural concerns |
When we inspect GTA rentals as part of an annual plan, owners appreciate the photo-rich, same-day PDF they can share internally. If you manage many doors, pairing quarterly DIY checks with a yearly certified inspection is a practical rhythm.
Buying Guide: Choosing the Right Inspection Support
Choose an inspector with residential and commercial certifications, clear scope, same-day reporting, and local experience. Ask about moisture detection, attic/roof access, HVAC verification, and photo documentation. For multi-unit portfolios, confirm scheduling flexibility and standardized templates for apples-to-apples reporting.
Here’s a quick buyer’s guide you can use to evaluate support for your rental property annual inspection checklist:
- Dual certification helps: InterNACHI (residential) and CCPIA (commercial) cover most building types in the GTA.
- Report speed: Same-day PDFs keep work orders moving while details are fresh.
- Moisture focus: Ask how they find and document hidden intrusion around showers, under sinks, and exterior walls.
- Attic/roof access: Verify safe access and what’s included if roof walking isn’t possible.
- Photo standards: Expect context photos plus close-ups. Each item should be obvious without extra explanation.
- Portfolio fit: For multiple units, request standardized templates so you can compare across addresses and years.
If you need certified support anywhere in the GTA, our inspection team performs residential and commercial evaluations with system-by-system clarity, moisture awareness, and same-day PDF reporting.
Tools and Resources
Arrive with the right tools: flashlight, GFCI tester, moisture meter, IR thermometer, ladder, PPE, and a standardized checklist. Back up findings with clear photos and a same‑day PDF so vendors can act quickly and tenants see what’s being addressed.
Practical tools we use in annual rental inspections:
- Flashlight + headlamp for panels, crawl areas, and attic voids.
- Outlet/GFCI tester for receptacles in kitchens, baths, garages, and exteriors.
- Moisture meter to verify suspicious stains or soft drywall.
- Infrared thermometer to spot unusual temperature patterns at ducts or electrical components.
- Camera/phone with wide and macro shots for context and details.
- Ladder with stabilizers when exterior/attic access is safe and allowed.
- PPE such as gloves and masks, especially in dusty attics or basements.
Case Studies/Examples
Short, real-world examples show why annual checklists matter: small moisture clues, failing safety devices, or ventilation gaps escalate fast if missed. Each mini case highlights the symptom, what we found, and the action that prevented bigger repairs and tenant disruption.
GTA condo: shower leak traced to failed grout
During an annual inspection, a faint stain outside a shower niche read high on a moisture meter. The tenant hadn’t noticed. We documented failing grout and a loose shower valve escutcheon. The owner regrouted and sealed, preventing ongoing seepage into adjacent drywall.
Townhome: frequent breaker trips in winter
Tenants reported occasional trips on cold evenings. Panel inspection found space heaters and a microwave sharing a circuit. We documented the pattern, recommended load balancing, and flagged minor discoloration on a receptacle for an electrician to evaluate.
Basement suite: stale air and condensation
Condensation on window frames pointed to poor ventilation. We verified weak bath fan flow and noted visible mildew at one corner. After cleaning and installing a higher‑CFM fan ducted to exterior, humidity readings normalized and surfaces dried out.
Local considerations for Suite 2000
- Schedule roof, gutter, and grading checks in fall ahead of freeze‑thaw cycles that can amplify small drainage issues across the GTA.
- Test heating in early fall and cooling in late spring so service calls don’t overlap peak-season backlogs common in larger metro areas.
- Document moisture risks aggressively; older buildings around the region often reveal minor seepage after heavy rain or rapid snowmelt.
Frequently Asked Questions
Landlords often ask about timing, scope, access, and documentation. Do inspections annually, follow a consistent order, photograph every finding, and summarize next steps in a same‑day PDF. For complex buildings or recurring issues, bring in a certified inspector for added assurance.
How often should I complete an annual inspection?
Once every 12 months is the baseline. Many owners pair that with quick quarterly walkthroughs to catch small issues between full reviews. Always schedule with proper notice and confirm access to mechanical rooms, attic entries, and exterior spaces.
What should be on my rental property annual inspection checklist?
Include exterior drainage, roofing/attic, structure and foundation, plumbing, electrical, HVAC, interior finishes, doors/windows, and life‑safety devices. Photograph each defect, prioritize by safety and function, and issue a same‑day PDF summary so vendors can act quickly.
When should I call a professional home inspector?
Bring in a certified inspector for recurring moisture, electrical trips, roof or structure concerns, or when you need unbiased documentation for negotiations, insurance, or larger portfolios. Certifications like InterNACHI and CCPIA signal broad system expertise.
Can I do the inspection while the tenant is home?
Yes—many tenants prefer it. Share your checklist, explain the order of rooms, and ask about any ongoing issues. Respect privacy, minimize disruption, and photograph only what relates to building conditions and safety.
What format is best for documentation?
A photo-rich, same‑day PDF with section headers and prioritized actions is easy to share with vendors and managers. Keep your original photos archived and attach the PDF to maintenance tickets so everyone sees the same facts.
Key Takeaways
Standardize your annual rental inspection, move outside‑in and top‑down, document with photos, and act on safety items first. For aging buildings or portfolios, combine DIY walkthroughs with certified inspections and same‑day PDF reporting to prevent small issues from becoming major repairs.
- Use one consistent rental property annual inspection checklist each year.
- Prioritize life‑safety, then function; document with clear photos.
- Verify drainage, roof/attic, plumbing, electrical, and HVAC on a set cadence.
- Talk with tenants; their day‑to‑day insight reduces surprises.
- For complex issues, add a certified inspection and formal PDF report.
Conclusion
An annual inspection checklist is your best defense against hidden defects. It creates a repeatable rhythm for safety, documentation, and planning—so you fix what matters, when it matters. If you want certified support anywhere in the GTA, we’re ready with same‑day PDF reporting.
Here’s the bottom line. A structured rental property annual inspection checklist turns maintenance chaos into a predictable routine. It builds trust with tenants, supports better negotiations, and protects long‑term value. When you need a deeper, certified look, our GTA inspectors bring InterNACHI and CCPIA expertise to homes, condos, and commercial spaces—always with a clear, same‑day report.