
Pre-listing inspection is a certified, seller-initiated home inspection completed before a property hits the market. It documents current condition, safety issues, and maintenance needs so you can plan repairs, price with confidence, and reduce renegotiations. For Toronto-area sellers, it speeds decisions and supports clean offers—especially with a same-day PDF report.
By ASM Home & Commercial Inspection — Last updated: 2026-05-26
At a Glance
A pre-listing inspection verifies a home’s condition before you list. Sellers use it to prioritize fixes, set a realistic price, and minimize surprises during buyer due diligence. Done by a certified inspector, it accelerates timelines, strengthens negotiation leverage, and often leads to smoother, faster closings.
Thinking about listing in the GTA? This guide shows exactly how a pre-listing inspection works, what’s included, and how Toronto sellers use it to avoid last‑minute deal friction.
- What a pre-listing inspection covers and why it matters
- Step-by-step walkthrough of the process
- How it compares to a buyer’s inspection (with table)
- Best practices, tools, and resources
- Buying guide to choose an InterNACHI/CCPIA certified inspector
Local considerations for Toronto-area sellers
- Plan bookings around peak spring/fall listing seasons when demand rises and inspector calendars fill up quickly across the GTA.
- Account for freeze/thaw cycles that stress roofs, foundations, and exterior caulking; seasonal checks catch moisture entry early.
- Older Toronto housing stock may include 60A electrical service, galvanized plumbing, and minimal attic insulation—flag these early.
What Is a Pre-Listing Inspection?
A pre-listing inspection is a professional assessment of a home’s major systems—roof, structure, electrical, plumbing, HVAC, and more—conducted before listing. Sellers use the report to disclose issues, complete targeted repairs, and support pricing. This proactive approach reduces surprise findings and keeps offers on track.
In simple terms, it flips the usual order. Instead of waiting for a buyer’s inspector to surface issues, you learn first. That means you can correct hazards, gather repair invoices, and position your home confidently.
Scope you can expect
- Roof and attic: shingles, flashing, sheathing, ventilation, insulation depth/coverage.
- Structure and exterior: foundation, grading, siding, decks, porches, stairs, railings.
- Interior: walls, floors, ceilings, doors, windows, cabinets and finishes.
- Plumbing: supply lines, drains, fixtures, water heater, visible leaks or corrosion.
- Electrical: main service, panel, breakers, GFCI/AFCI presence, representative outlets/switches.
- HVAC: furnace, AC, distribution, filter condition, thermostat operation.
- Basement and crawlspaces: moisture intrusion indicators, sump, vapor barriers.
ASM Home & Commercial Inspection performs this as a system-by-system evaluation and delivers a same-day PDF report. That fast turnaround is crucial when you’re preparing to list on a tight timeline; you can act within hours, not days. See our inspection service overview for details.
Why Pre-Listing Matters for Sellers
Pre-listing inspections help sellers avoid last-minute price cuts. By surfacing safety hazards and maintenance needs early, you control the narrative, bundle repairs, and document improvements. The result is fewer deal delays, clearer disclosures, and stronger buyer confidence.
Buyers hate surprises; lenders and insurers do too. When you show documented findings and repairs up front, you remove doubt and reduce the urge to renegotiate post-offer.
Benefits you’ll feel during listing
- Negotiation leverage: Provide receipts and photos so buyers see issues already addressed.
- Faster timelines: If the buyer waives or shortens inspection contingencies, the deal can move faster.
- Fewer walkaways: Clear disclosures reduce fallout from unexpected findings.
- Marketing boost: “Pre-inspected” language signals confidence and transparency.
- Safety and liability: Address hazards (loose handrails, missing GFCIs, active leaks) before showings.
In our experience with Toronto sellers, the biggest game-changer is moisture control. Early leak detection prevents stained ceilings, musty basements, and mold concerns that scare buyers. We emphasize moisture checks because even small, persistent leaks can damage finishes and framing over time.
How a Pre-Listing Inspection Works (Step-by-Step)
The process is straightforward: book, prepare, inspect, review, and act. You’ll receive a same-day PDF with photos and prioritized recommendations. Tackle safety hazards first, then high-ROI repairs, and optionally share the report during showings to build buyer confidence.
Here’s a seller-friendly breakdown we use with GTA clients.
Step-by-step workflow
- Schedule: Pick a morning or early afternoon appointment to leave runway for same-day actions. Schedule with ASM when your listing date is 1–3 weeks out.
- Prepare access: Clear utility rooms, unlock panels, and free up attic/basement hatches.
- Inspection walk-through: We test representative outlets/switches, run fixtures, operate HVAC, and enter accessible spaces safely.
- Moisture scan: We check typical intrusion points—basement corners, under sinks, around windows/doors—with a meter and thermal camera when helpful.
- Report delivery: Receive your same-day PDF with photos, notes, and prioritized recommendations.
- Action plan: Fix hazards (e.g., missing GFCIs, active leaks), then address visible wear that downgrades first impressions.
- Disclosure & marketing: Provide the summary to your agent; decide what to share in the listing package and at showings.
Typical technical markers we document include moisture readings at suspect areas, insulation depth (inches), electrical service rating (e.g., 60A vs. 100A+), and presence of safety devices like GFCI/AFCI protection. Concrete, factual details like these make your disclosures credible.
Types of Pre-Listing Inspections
Most sellers choose a full home inspection covering all major systems. Some opt for focused mini-inspections on big-ticket areas—roof, foundation, or HVAC—when time is tight. The right approach depends on your timeline, property age, and buyer expectations in your market.
Common approaches
- Full pre-listing inspection: Best for older or renovated homes; creates a comprehensive baseline with photos.
- Roof-only or exterior-focused: Useful before roofing quotes or after storms; shingles, flashing, gutters, downspouts, grading.
- Structure and foundation check: Evaluates cracks, settlement patterns, and water management around the perimeter.
- Mechanical systems spot-check: Furnace/AC operation, filter condition, water heater age/operation, venting, visible exhausts.
- Pre-offer walk-through with your agent: A quick, high-level look to flag obvious defects (not a substitute for an inspection report).
Not sure which path fits? We can help you choose a scope based on your listing strategy. Start with our Toronto inspection services and tell us your timeline.
Best Practices: Getting the Most from Your Inspection
Clear access, complete utility operation, and minor prep work lead to better results. Fix simple hazards first, gather maintenance records, and photograph key upgrades. Share highlights in your listing to signal transparency and care.
Preparation checklist
- Unlock electrical panels, utility closets, garages, and outbuildings.
- Replace HVAC filters and test thermostats in both heating and cooling modes.
- Run water at every sink and tub; check for drips and slow drains.
- Free attic/basement access; move stored items away from walls by 2–3 feet.
- Label remotes and provide any smart-home app access for testing (if applicable).
High-ROI fixes sellers often tackle
- Moisture control: Re-caulk/tape around tubs and showers, correct gutter downspout extensions, and seal small exterior gaps.
- Electrical safety: Install GFCIs near sinks and in the garage; test smoke/CO alarms and replace units older than 10 years.
- HVAC and ventilation: Clean returns/supplies, confirm bathroom and kitchen exhausts vent outside, not into the attic.
- Exterior grading: Maintain a gentle slope away from the foundation; re-direct splash blocks and extend downspouts.
- Cosmetic touch-ups: Patch nail pops, re-seat loose handrails, and adjust sticky doors for smooth showings.
These simple moves don’t mask defects; they demonstrate stewardship. Buyers notice. If you need a quick sanity check before listing photos, book a targeted revisit through our GTA inspection team.
Tools and Resources Inspectors Use
Certified inspectors rely on moisture meters, thermal imaging, outlet testers, and ladders/roof tools to evaluate systems safely. High-quality photos and organized notes flow into a same-day PDF report you can share with your agent and buyers.
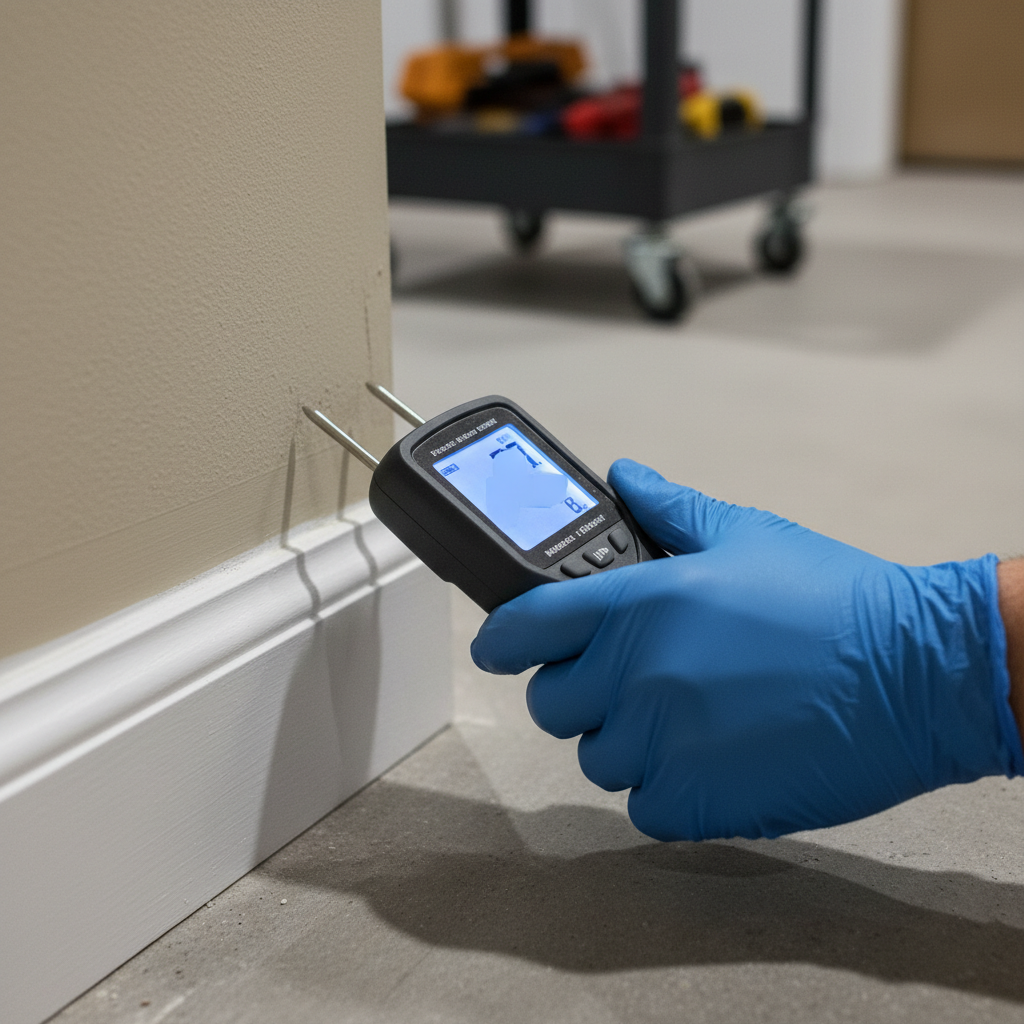
We prioritize moisture intrusion checks because water causes outsized damage over time. A pin or pinless moisture meter quickly spots elevated readings at baseboards, under sinks, around window sills, and in basement corners.
Typical equipment we bring
- Moisture meter and, when useful, a thermal camera for temperature anomalies.
- Receptacle/GFCI testers and a non-contact voltage detector for basic electrical checks.
- Combustion analyzer or ambient CO detector for safety screening near fuel-burning appliances.
- Inspection ladders and roof tools for safe access to edges, flashing, and gutters.
- Digital camera and mobile software to generate a same-day PDF report with photos.
Want a simple marketing add-on? Buyer’s Inspection
Both inspections review the same home systems, but the goals differ. A seller’s pre-listing inspection informs pricing and repairs, while a buyer’s inspection assesses risk and negotiation points. Sharing your pre-listing report can reduce friction and speed up contingencies.
| Aspect | Pre-Listing (Seller) | Buyer’s Inspection |
|---|---|---|
| Timing | Before listing photos and showings | After accepted offer, during contingency |
| Primary goal | Plan repairs, set price, disclose | Evaluate risk, request credits/repairs |
| Negotiation effect | Fewer surprises; smoother timelines | May trigger renegotiations or delays |
| Report sharing | Optional in the listing package | Typically private to the buyer |
| Common outcomes | Targeted fixes, confident pricing | Repair requests, price adjustments |
We find sellers who address a short list of safety and moisture items up front rarely face dramatic post-offer requests. That steadies timelines for everyone at the table.
Buying Guide: How to Choose the Right Inspector
Look for current certifications, clear sample reports, responsive scheduling, and same-day delivery. Favor inspectors with InterNACHI for homes and CCPIA for commercial or mixed-use. Ask how moisture, roof access, and safety devices will be evaluated—and how photos are organized in the PDF.
Evaluation checklist
- Certifications: InterNACHI (residential) and CCPIA (commercial) demonstrate training and standards.
- Sample deliverables: Ask for a redacted PDF so you can see photo quality, summary pages, and prioritization.
- Turnaround time: Same-day reporting keeps listings on schedule.
- Communication: You want clear explanations, not jargon—especially for buyers reading your report later.
- Local experience: Toronto’s mixed housing stock (century homes to infill) demands adaptable inspection methods.
If you’re new to the process, this homeowner-friendly buyer checklist overview offers a simple lens on what buyers look for—useful context when you decide what to fix before listing. When you’re ready, book an ASM pre-listing inspection and we’ll align scope to your timeline.
Pricing and ROI Considerations (No Numbers, All Value)
Think in terms of risk reduction and momentum. The value of a pre-listing inspection is measured in fewer surprises, tighter timelines, and the confidence to hold your price. Pair essential safety fixes with clear disclosures to protect your bottom line.
Here’s a practical way to frame value without talking dollars.
- Risk management: Address items likely to trigger buyer concern (active leaks, unsafe wiring, non-functioning HVAC).
- Marketing clarity: Pre-inspected status and recent repairs are positive signals on listing sheets.
- Negotiation stability: Accurate disclosures reduce scope for aggressive post-offer requests.
- Time savings: Fewer scheduling gaps between offer, repair quotes, and re-inspections.
If you want help prioritizing fixes for buyer psychology, ask us to flag “showstopper” vs. “nice-to-have” items in your ASM report review.
Case Studies: Real GTA Seller Scenarios
Sellers who act on pre-listing findings move faster and negotiate with confidence. These brief examples show the kinds of hazards and maintenance items we often uncover—and how solving them early streamlines closing.
1) Semi-detached with musty basement
A Toronto semi showed high moisture near baseboards behind stored boxes. We found clogged downspouts and negative grading. After extensions and minor regrading, follow-up meter readings dropped to normal, odors cleared, and the seller listed without “mold anxiety” derailing showings.
2) Post-renovation condo with GFCI gaps
A recent kitchen/bath refresh missed GFCI protection near sinks. The seller’s electrician installed GFCIs and labeled the panel. The fix eliminated a likely buyer safety objection and simplified the condo status-package discussion.
3) Century home with roof wear
Shingle edges were curling and flashing showed prior patching. The seller secured a roofing quote and completed targeted repairs at penetrations and valleys, then shared invoices with the listing package. Buyer confidence rose because evidence was clear and recent.

Frequently Asked Questions
Sellers ask about disclosure, timing, and whether buyers will still inspect. Here are concise answers you can trust, shaped by our Toronto inspection experience and same-day reporting workflow.
Do buyers still do their own inspection if I share mine?
Often, yes. A buyer may still order an inspection, but your report sets expectations and reduces surprises. Many buyers focus on verifying known items rather than hunting for new issues, which helps keep timelines predictable.
When should I schedule the pre-listing inspection?
Book 1–3 weeks before your go‑live date. That gives time to complete essential repairs, gather invoices, and update disclosures. In peak GTA seasons, earlier is better to secure a convenient slot.
What if the inspection finds a serious issue?
Don’t panic. Prioritize safety first, then consult licensed pros for quotes and solutions. Document the fix and include receipts. Being transparent usually preserves buyer trust and prevents last-minute renegotiations.
Should I share the full report with buyers?
Many sellers share the summary and major repair receipts up front, then provide the full PDF upon request. Your agent can advise based on local norms and your negotiation strategy.
Key Takeaways
Pre-listing inspections deliver speed, clarity, and leverage. Inspect early, fix safety and moisture issues first, and package clear documentation for buyers. That’s how Toronto sellers keep momentum and protect their asking price.
- Inspect before photos and showings to control the narrative.
- Prioritize moisture management, electrical safety, and HVAC function.
- Use a certified inspector who provides a same-day PDF.
- Share highlights to build buyer confidence and reduce delays.
Conclusion and Next Steps
A seller-initiated inspection turns unknowns into a plan. With a same-day report and targeted fixes, you’ll list confidently and keep contingencies tight. That’s the simplest path to a smoother sale.
Ready to get your listing market-ready? Book your pre-listing inspection with ASM Home & Commercial Inspection. We’re InterNACHI and CCPIA certified, we serve the GTA, and we deliver organized, same-day PDFs your buyers understand.
Bonus resource: For a marketing refresher on listings, this high-level real estate listings guide pairs well with your inspection report when planning launch materials.
Considering listing soon? Message our Toronto inspection team for a quick scope review. We’ll line up timing, clarify deliverables, and make sure your pre-listing inspection serves your strategy.