
Crawl space inspection is the systematic evaluation of the area beneath a home to find moisture, structural, pest, and safety issues. For homeowners and investors around Suite 2000 in the GTA, ASM Home & Commercial Inspection integrates this scope into residential and commercial inspections and delivers a same-day PDF report so you can act quickly.
By Asmhomeinspection • Last updated: June 3, 2026
Overview and Table of Contents
This guide explains crawl space inspection in plain language: what it is, why it matters, how pros do it, common defects, tools, preventive steps, and local tips for GTA properties. Use the checklist, comparison table, and FAQs to make confident decisions and plan maintenance with same-day reporting support.
Here’s what you’ll learn and how to use it right away.
- What a crawl space inspection includes and doesn’t include
- Why moisture control and structure checks protect your home’s value
- Step-by-step procedure our InterNACHI/CCPIA inspector follows
- Vented vs sealed vs encapsulated crawl spaces (with comparison)
- Actionable best practices and a printable checklist
- Real GTA case examples and when to escalate repairs
- FAQ answers you can read in under a minute
Quick navigation:
- What is a crawl space inspection?
- Why inspections matter
- How inspections work
- Types and approaches
- Inspection checklist
- Best practices
- Tools we use
- Case studies
- FAQ
- Key takeaways
- Conclusion and next steps
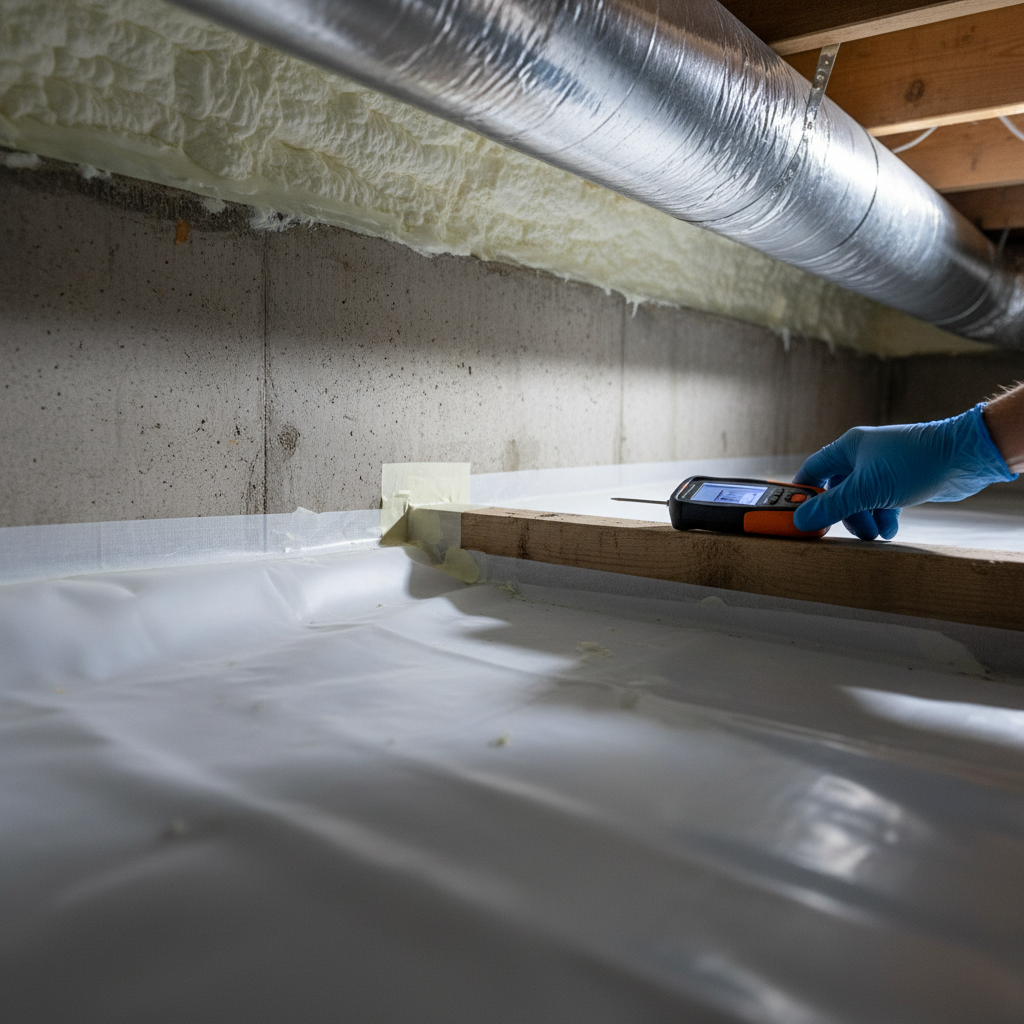
What Is a Crawl Space Inspection?
A crawl space inspection is a comprehensive check of the subfloor area under a home to evaluate moisture, structure, insulation, ventilation, plumbing, electrical, pests, and safety conditions. Inspectors document findings with photos and readings, then provide a prioritized action plan in a clear, same-day PDF report.
At its core, a crawl space inspection helps you understand the health of what supports your home. We examine access, clearance, soil conditions, vapor barriers, and drainage patterns that influence moisture. We also review framing members (sills, beams, joists, piers), utilities (plumbing, HVAC, electrical), and visible signs of pests or mold-like growth.
- Moisture risk profile: Relative humidity, condensation points, and wood moisture content (decay risk typically increases above about 20%).
- Structural condition: Sill plates, beams, joists, bridging, columns/piers, and subfloor for rot, sagging, or notching/boring issues.
- Building envelope: Vapor barrier coverage and seams, rim-joist insulation, air sealing around penetrations, and ventilation strategy.
- Mechanical and electrical: Leaky traps, galvanized or cast-iron sections, duct leakage, unprotected wiring, and unsupported runs.
- Environmental indicators: Efflorescence, staining, soil dampness, musty odors, and pest activity such as tunnels or droppings.
We align our review with our broader residential and commercial inspections so your crawl space findings sit alongside roof, foundation, plumbing, electrical, and HVAC observations in one integrated report.
Why Crawl Space Inspections Matter
Crawl space conditions influence structural integrity and indoor air quality. Moisture drives wood decay and mold, while sagging framing telegraphs into uneven floors. A timely inspection identifies root causes, ranks urgency, and prevents minor issues from becoming major repairs.
Moisture is the headline risk. When relative humidity holds above roughly 60%, you can see condensation on cooler surfaces. Persistently damp wood with moisture content above about 20% becomes susceptible to decay fungi. Those two numbers alone explain why ventilation, air sealing, and drainage matter so much beneath a home.
- Structure and safety: Even 1/4 inch of differential settlement across short spans can be felt as floor slope. Loose piers, decayed sill plates, or split joists compound movement.
- Indoor air quality: Air moves upward through buildings (stack effect). Odors and spores from a wet crawl space can migrate into living areas.
- Energy and comfort: Uninsulated rim joists and leaky ducts waste energy. Air leaks increase heating loads in winter and cooling loads in summer.
- Transaction confidence: Pre-purchase and pre-listing inspections reduce surprises. A same-day PDF with photos supports negotiation and planning.
For GTA buyers, sellers, and property managers, tying a crawl space inspection into an overall home inspection keeps your maintenance plan grounded in data, not guesses.
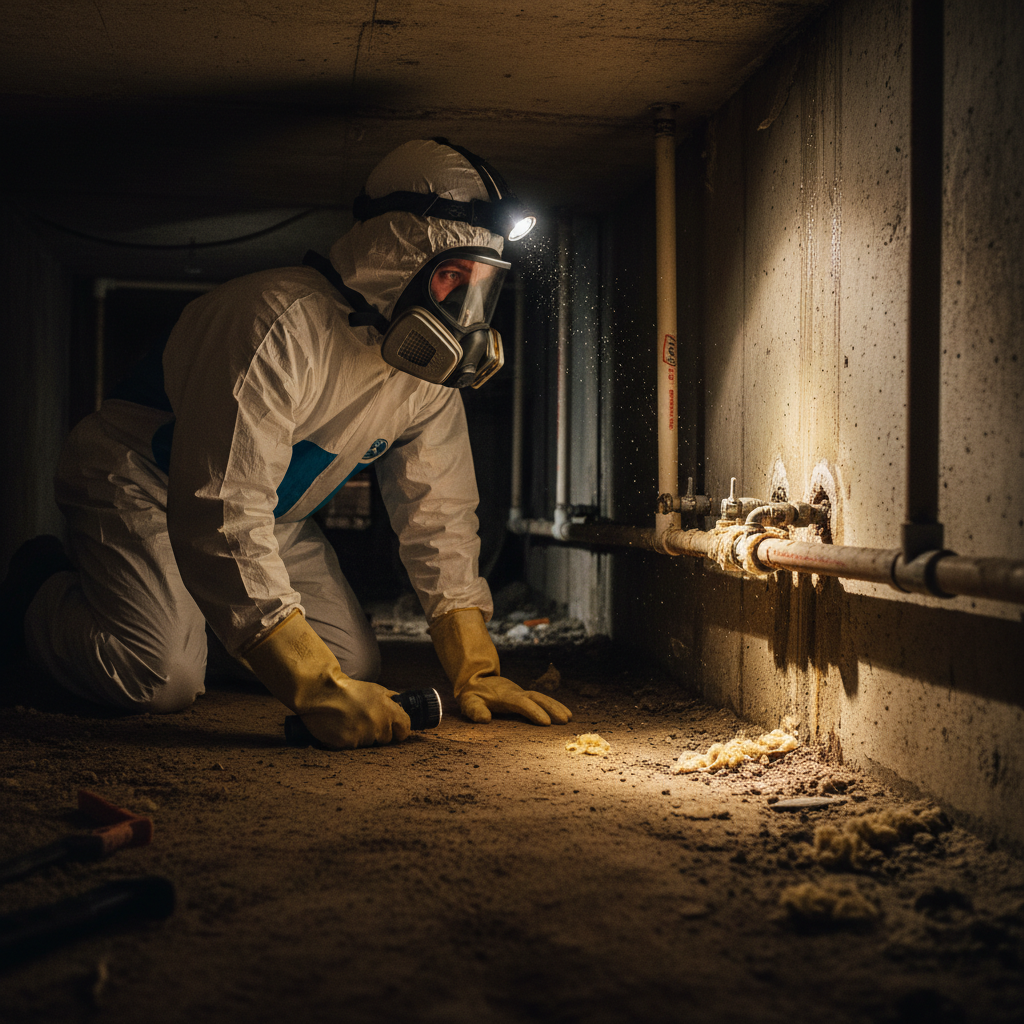
How a Professional Crawl Space Inspection Works
A pro inspection follows a repeatable sequence: safety prep, exterior drainage review, access check, moisture screening, structural assessment, utilities review, insulation/air sealing check, and on-site documentation. You receive a same-day PDF report with photos, readings, and prioritized actions.
Here’s the step-by-step process our InterNACHI and CCPIA certified inspector follows on GTA homes and small commercial buildings.
- Safety and scope briefing: PPE (coveralls, gloves, respirator as needed), hazard scan, and defined limits of inspection.
- Exterior drainage and grading: Downspouts, splash blocks, and grading slope influence crawl moisture. Even 1–2% slope away from the structure aids runoff.
- Access and clearance: Confirm safe entry and adequate clearance (often around 18 inches below joists, but verify local code). Note obstructions.
- Moisture screening: Spot-check relative humidity and temperature; take surface or pin readings on wood members; observe soil dampness and vapor barrier coverage.
- Structural review: Inspect sills, beams, joists, posts, and connections for decay, sag, cracks, or improper notching/boring.
- Utilities review: Look for plumbing leaks, unsupported waste lines, duct insulation gaps, and electrical protection/strain relief issues.
- Envelope, insulation, ventilation: Evaluate vapor barrier seams (overlap ~6–12 inches), rim-joist insulation, air leaks, and the ventilation/encapsulation approach.
- Documentation and wrap-up: Capture photos, annotate findings, and compile a same-day PDF. Provide immediate safety notes when necessary.
Because crawl spaces vary widely, we calibrate the inspection to property age, renovations, and occupancy. The output is always practical: clear photos, short explanations, and a prioritized to-do list you can actually use.
Types of Crawl Spaces and Approaches
Most homes use one of three strategies: vented, sealed, or fully encapsulated crawl spaces. Each approach manages moisture and air differently. The right choice depends on climate, site drainage, and renovation goals—and your inspection should align with that design.
Understanding how your crawl space is intended to work makes every recommendation sharper. Here’s a quick comparison.
| Approach | How it works | Typical cues | Inspection focus | Common upgrades |
|---|---|---|---|---|
| Vented | Outdoor air flows through foundation vents to dilute moisture. | Visible vents, minimal air sealing at rim joists. | Check seasonal RH swings, duct leakage, and cold floors in winter. | Better grading, extend downspouts, air seal rim, consider dehumidifier. |
| Sealed | Vents closed; controlled air exchange via HVAC/transfer grilles. | Sealed vents, partial vapor barrier, some rim insulation. | Confirm air pathways and monitor RH; inspect continuous barrier seams. | Complete barrier, air sealing, dedicated dehumidification as needed. |
| Encapsulated | Continuous vapor barrier on soil and walls; conditioned or dehumidified air. | White/black poly liner sealed to walls and pillars; taped seams. | Verify adhesion at perimeter, sealed penetrations, and equipment sizing. | Full liner replacement at damage; sump pump or dehumidifier service. |
Not sure which you have? Our inspection report identifies the existing strategy and flags mismatches—like vented designs retrofitted with partial liners but no moisture control plan.
Crawl Space Inspection Checklist (What We Check)
Use this checklist to track a thorough crawl space inspection: access and safety, moisture and ventilation, structure, plumbing and electrical, insulation and air sealing, pests, and documentation. Each finding should include photos, readings, and a clear recommendation.
Access, safety, and moisture
- Safe entry, adequate clearance, and intact hatch framing
- Standing water, damp soil, or efflorescence on foundation walls
- Relative humidity snapshot and wood moisture content (aim for drier than ~16–19%)
- Vapor barrier coverage, thickness, and taped/overlapped seams
Structure and foundation
- Sill plates for rot/termite damage; proper sill gasket or separation from masonry
- Beams/joists for sag, cracks, notching/boring beyond common limits
- Posts/piers for plumb alignment and proper load transfer
- Subfloor condition below kitchens/baths and laundry areas
Plumbing, electrical, HVAC
- Plumbing inspection: Leaks at traps and unions; unsupported waste lines; corrosion at older materials
- Electrical inspection: Exposed splices, missing junction covers, or unprotected NM cable
- HVAC inspection: Duct insulation continuity, condensation at A/C lines, and return/supply leakage
Insulation, air sealing, pests
- Rim-joist insulation and air sealing around penetrations
- Foam/fire-blocking at utility chases where required
- Signs of rodents/insects and sealed entry points
- Mold-like growth or staining and contributing moisture sources
We consolidate this scope within a broader residential home inspection so you get one same-day PDF that ties crawl space risks to roof, attic, plumbing, electrical, and HVAC conditions.
Best Practices to Prevent Moisture and Damage
Keep water out, seal air leaks, and control humidity. Ensure positive grading and extended downspouts, install and seal vapor barriers, air seal at rim joists, and use dehumidification or sump systems as needed. Verify leaks quickly and document improvements.
Prevention beats remediation. A few disciplined practices reduce risk and protect value.
- Manage roof runoff: Extend downspouts and maintain splash blocks. Even a few extra feet often diverts hundreds of gallons during a storm.
- Maintain grading: Target 1–2% slope away from the foundation where feasible.
- Install/upgrade the vapor barrier: Use durable polyethylene, overlap seams 6–12 inches, and seal to perimeter walls and piers.
- Seal the rim joist: Air seal and insulate to cut drafts and condensation.
- Control humidity: Dehumidifiers or conditioned-air strategies help keep RH below roughly 60%.
- Fix small leaks fast: Drips at traps can deliver gallons per day over time.
- Document changes: Take before/after photos so future owners understand the upgrades.
Planning future renovations? Understanding code-related basics improves outcomes and reduces rework. See these accessible overviews on basement framing code basics and the permit process overview for context. If you suspect main-line issues, consider a drain video inspection before encapsulation work.
Tools We Use and Why They Matter
Professional inspectors use moisture meters, hygrometers, thermal cameras, borescopes, and high-output lighting alongside PPE. These tools turn observations into measurements so you can prioritize repairs with confidence and verify fixes later.
- Moisture meters: Pin/pinless readings reveal damp wood behind clean-looking surfaces.
- Hygrometers/thermometers: RH and temperature snapshots help predict condensation risk.
- Thermal imaging (IR): Highlights temperature differentials near cold air leaks or wet zones.
- Borescopes: Peer into tight spaces without demolition.
- High-output lighting and cameras: Clear photos document conditions for the same-day PDF.
- PPE: Coveralls, gloves, and respirators as needed keep the inspection safe.
In our experience serving GTA buyers, sellers, and managers, instruments plus photos create a shared reality. That shared reality makes contractor quotes more consistent and project scope easier to manage.
Thinking about buying or listing? Fold a crawl space inspection into your pre-purchase or pre-listing plan. Book with ASM Home & Commercial Inspection for certified expertise and a same-day PDF report.
Case Studies from GTA Properties
Real examples show how small crawl space issues grow. These GTA snapshots highlight moisture entry, framing movement, and utility leaks—and how a prioritized plan, photos, and readings led to practical fixes and safer, drier homes.
- Pre-purchase bungalow: Damp soil, no continuous liner, and open vents. Readings near 65% RH with wood around 18–19% MC. Action: extend downspouts, add full vapor barrier, air seal rim joist, and monitor with a compact dehumidifier.
- Rental townhome: Mid-span beam deflection telegraphed into a noticeable floor dip (~1/2 inch over 10 feet). Action: structural evaluation recommended; temporary shoring followed by a permanent pier/beam correction.
- Commercial retail bay: Plumbing penetrations left unsealed; rodent entry and staining below a restroom. Action: seal penetrations, correct trap leak, and add pest exclusion; follow-up inspection confirmed dry conditions within two weeks.
- Post-renovation review: New liner with untaped seams and gaps at piers. Action: reseal seams (6–12 inch overlaps), adhere to walls, and recheck RH after two weeks—dropped to under ~55%.
These outcomes follow a pattern: measure, correct the source, then verify. We fold those steps into every same-day PDF report so owners, agents, and contractors stay aligned.
Local considerations for Suite 2000
- Spring thaw and heavy summer rain can push moisture toward foundations; schedule inspections before the wettest months to catch drainage issues early.
- Warm, humid summer air raises crawl space RH; monitoring helps keep levels below about 60% and reduces condensation risk on cool surfaces.
- Older GTA housing stock mixes vented and partially sealed designs; match your moisture strategy to the actual build rather than assumptions.
Frequently Asked Questions
Homeowners ask about timing, red flags, ventilation, encapsulation, and reporting. Aim for annual checks or at key transaction moments, watch for moisture and structural movement, choose a strategy aligned with your crawl space type, and request a same-day, photo-rich PDF.
How often should I schedule a crawl space inspection?
Plan annually for aging homes or properties with moisture history. Add inspections before buying or listing, after major storms, or following plumbing repairs. If a dehumidifier or sump system is installed, recheck readings within a couple of weeks after adjustments.
What are the most common red flags in a crawl space?
Persistent damp soil, wood moisture near or above ~20%, musty odors, sagging joists, unsealed utility penetrations, and leaks at traps or unions. Also look for missing or damaged vapor barriers, rodent activity, and uninsulated rim joists.
Is a sealed or encapsulated crawl space better than a vented one?
It depends on climate, drainage, and renovation goals. Encapsulation controls moisture well when installed correctly, but it must be paired with dehumidification or conditioning. Vented designs can work with excellent drainage and air sealing. Your inspection should guide the decision.
What does the crawl space inspection report include?
You’ll receive a same-day PDF with photos, moisture and RH readings, a clear description of defects, and prioritized recommendations. We align crawl space notes with roof, foundation, plumbing, electrical, and HVAC findings so you can plan repairs in order.
Key Takeaways
Crawl space inspections protect structure, air quality, and energy efficiency. Focus on water control, air sealing, and humidity management. Use measurements and photos to prioritize repairs, then verify fixes with follow-up readings and documentation.
- Moisture control is non-negotiable—keep RH below about 60% and wood drier than ~16–19%.
- Structure first: correct sagging and decayed members before finishing spaces above.
- Choose vented, sealed, or encapsulated strategies intentionally—not by accident.
- Document with photos and readings; recheck after changes to confirm improvement.
- Integrate crawl findings into a broader home inspection plan for clarity.
Conclusion and Next Steps
A thorough crawl space inspection reveals risks you can’t see from the living room. Measure moisture, check structure, and verify drainage. Then act in priority order and confirm results. When you’re ready, book a certified inspection with same-day reporting across the GTA.
- Review this guide’s checklist and note any known moisture or movement issues.
- Bundle crawl space scope with your pre-purchase, pre-listing, or annual maintenance inspection.
- Use the photo-rich, same-day PDF to coordinate quotes and schedule repairs.
- In Suite 2000 and across the GTA, schedule with ASM Home & Commercial Inspection for InterNACHI/CCPIA-certified service.
Ready to move forward? Book your crawl space inspection with ASM Home & Commercial Inspection and get a same-day PDF report you can trust.